Treat Your Home With Original Artwork

Have an office or a conference room You need to dress up?  Like to impress Your guests? Love to relax at home admiring the unique decor?
We have a selection of Original Artwork and One Of A Kind Home Decor made by artists and professional craftsmen based in Lithuania.We dropped in a few prints, they are not considered as copies, but rather an original numbered, dated and signed art pieces, as each print varies in contrast and color. There is a selection of paintings, watercolor illustrations, metal works and ceramics to suit most tastes and interiors.
Minimalist Oil on Canvas Painting by ArtRasa
Pastel and charcoal on paper by colorsofland
Hand Made Rusty Iron Wall Clock from Inthetime
Paper Clay Art Doll from AnnaZuevaDolls
Lino Block Printed Linen Table Runner from kaupole
Lino Cut Print, Recycled Linen Cushion Cover by IndrajasSoulKitchen
Ceramic Sculpture Wall Decor by RamunesCeramics
Original Artwork Ink On Paper by DePianoArt
Wool Felt Wall Art from DaliaNerijusFelt
Watercolor Illustration by NORAillustration

Art dolls with a story to tell by AdelePo

This time we would like to introduce you Adelė, doll maker and artist in her twenties, living in Lithuania – the land of possibilities where she can create dolls and make a living from it! 
And here is her story...

Almost 4 years ago I became a part of the magical world of art dolls. My journey began in Vilnius art academy where I studied set design and puppet theatre. While studying was a great adventure, in real life after a few plays as a set designer, I knew that this path is not for me so I plunged myself into interior dolls. At that time I couldn’t imagine how my life will change after this decision. And here I am, talking to you as a full time artist, who’s building her career from ground up. I guess anything is possible, huh?
My dolls are more than just a decoration, because everyone of them have a story to tell. I bring a unique tale in a little creature. Every costume, every lock of hair, every tiny detail is telling you how special and exclusive this art doll is. I love the feeling when the doll is completed, wrapped up with a ribbon and a hand written story. It’s like another page added to my creation journey. I hope that you can see and feel the same passion, joy and love for life in my dolls like I do.

Stay around if you’re interested in uncommon art of dolls!

You can see more of her works in website AdelePo and talk to her in FaceBook
 

Happy Mother's Day - Best gift ideas

PIN CUSHION by RedPin
Hand Painted Pillar Candle Cube by LessCandles
Mom hoop art by mellsva
Personalized message love wooden heart by PapaAngel
Ceramic Angel Figurine Statue  by RamunesCeramic
Leather Recipe book by AVworkshop
Peacock pendant by TheJewelryIsland
Personalized Tablet Holder by CountryBarnBabe
Mother's Day Card by HelloPhoebeShop
Best Mom Ever Mug by AvonnieStudio
Heart Pillow, Mothers Day Gift by PeggyCollinsPhotoArt
Medium Spa Gift Set by VillageSoapShoppe

Happy Easter dear friends!!!

Happy Easter print by WhiteAspenPrints
Mini Bunny Wreath by EverBloomingOriginal
Burlap Easter basket by HedgehogKingdom
Chicken Earrings by GlassRiverJewelry
Easter Sheep Dolls by IrinaMargarita
Easter Egg Soy Wax Candles by MiLiCrafts
Easter decor linen eggs with cross stitch by RedPin
Felted Bunny egg cozy by Vilnone
Blue polka dot Linen napkins by CozyLinen
Grey wool felted Bunny coat by DressInFelt
Felted bunnies adult size slippers by SimplicityOfFelt

Wood home decor by Holeybox

HOLEYBOX SHOP is the shop for people who are looking for something interesting and modern. Step right up and meet our divers team of creators. All of us in they respective area of trade- the people who make the unique and the exclusive happen on a daily basis.
 The idea of the shop is to charm the people with unique, one-of-a-kind, limited- edition, and hand-crafted products.
All of our products are made with the utmost care and love.
Materials- different Lithuanian wood (oak, pine, birch, asp, ash...)
 Have any offers, wishes, or simply cannot find what are you looking for? No problem! Send us a letter and we will try to help you with that. 

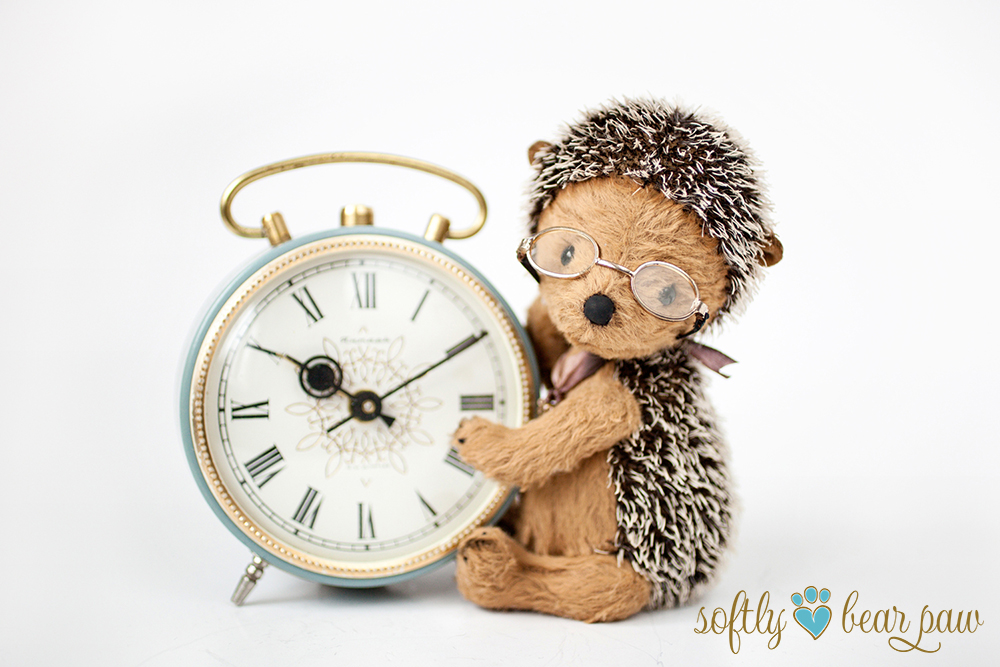
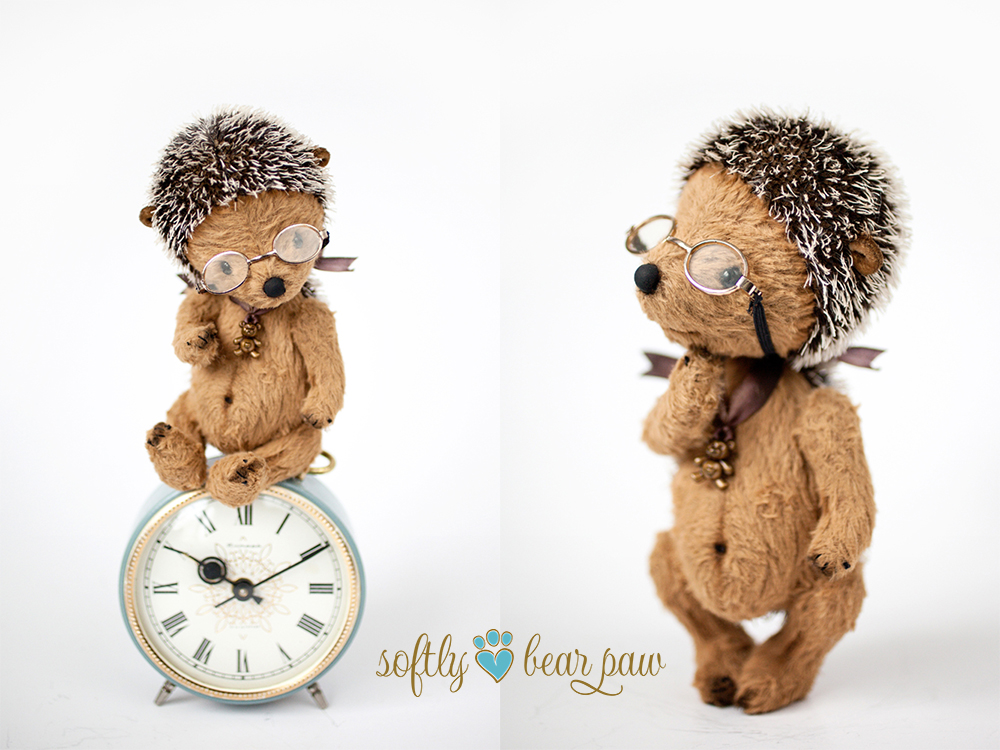
DIY: Artist Teddy bear Hedgehog Free Step by step TUTORIAL by SoftlyBearPaw

This is my Teddy bear Hedgehog free tutorial which I would like to share with you. Teddy Hedgehog is 19cm tall while standing.
Happy sewing my friends ;) 
 
Material list

Hedgehog mohair 9mm pile – 20x20cm
Brown viscose 6mm pile – 25x22cm
Little piece of suedine for ears
6mm black glass eyes
6 x 15mm wooden discs for head and arms
4 x 20mm wooden discs for legs
10 x 12mm washers
5 T-shape cotter pins
Fiber fill for stuffing
Steel pellets for legs and tummy
Strong thread for sewing
Very strong eye yarn
Nose thread


Sewing Supplies
Little sharp scissors, Awl, Pins and needles, Cotter key and long nose pliers, Wooden stuffer, Fray stop, Oil paint and paintbrush for shading.

Bear Pattern
First of all you will need to transfer the pattern on heavy paper, and cut out all the details.  Mark all the signs that are shown on the pattern.
The arrow indicates the direction of the hair. The big dot shows the place where you will need to make a hole for joints. You also see a marked places where you must leave open place. Just make sure than you made a good knots in the end of seams and stain the open place with stir fray glue.
 
Transfer them to the wrong side of the fabric. It is most convenient to make it with a ballpoint pen. On light color fabrics I just use a pencil. Mark out all the pairs of items in mirror image. All my patterns are with 3mm seam allowance so you don’t need to add more. When working with patterns, pay special attention to all the marks! Transfer them all on the fabric.
Once the pieces all fit correctly onto the fabric then cut them out using a sharp scissors. I use embroidery scissors for cutting the pile. When cutting out fur (especially those with longer pile) insert the scissors under the fur when you cut.

Head
Start with the head and muzzle pieces. Place these pieces together with the furs together (inside out) and pin them. (You can never use too many pins!)When pieces are pined then sew them. Use back stitch to sew the pieces together. All seams are 3mm. 

After this you will have two head pieces. Now sew the arrow on each of the peace. After you have two finished peaces place them together with the furs together (inside out) and pin all around and sew. Don’t forget to leave hole for head joint.
Apply fray stop to the open area to prevent fraying during the stuffing.
Turn the hedgehog head to the right side out.  Stuff the head starting at the nose with small pieces of stuffing at a time. Use wooden stuffer.
Eyes
Place pins in the position you would like your eyes to be to test where the eyes should be inserted. Cut a long piece of eye thread. Pick one of the lengths, and thread both ends through the long doll needle, leaving a loop at the end. Insert the needle in the place where the ears should be, coming out through the hole of the opposite socket where the eye pin is inserted.  

mportant Note: leave thread loop hanging out of the ear – DO NOT PULL ALL THE WAY THROUGH.
Thread the needle through the wire loop of the eye and insert the needle back in the same hole. Come out almost next to where you started.
Wrap the needle 3 times through the synthetic sinew loop you’ve left behind and pull hard.
Insert needle next to where you first started and exit anywhere on the head.

Nose and mouth
Select a nose shape. Mark the shape onto the nose area and embroider it on using a satin stitch. Stitch the mouth on in the shape you desire.

Body
Sew the back part of the body piece and the front part of the body piece together to form the two sides of the body.
Place the two body pieces together and sew around, leaving the back open as indicated on the pattern.
Apply fray stop to the opening in the back to prevent fraying during stuffing.
Turn your body the right side out.

Arms and Legs
As my hedgehog pattern arms are without paws. Just put the arms pieces rights sides together and sew around the edges leaving and open space as shown in the pattern. And repeat this with the legs. Apply fray stop to the opening to prevent fraying during stuffing.

Ears
Sew around the ears leaving an open space where indicated on the pattern. Turn the right way around. Sew the ear closed using a ladder stitch. Pin the ears in place. Attach to the head using a ladder stitch.

Jointing the limbs
Thread a washer and a disc onto a cotter pin. Put the cotter pin/washer/disc set into the hole (use an awl to make a hole) in your limb and push the cotter pin through the marked joint hole and then into the corresponding hole in the body. Add the disc and another washer and with the help of a long nose pliers or a cotter pin turner, turn each cotter pin's leg away from each other and tighten it very well. Perform the steps for the other limbs.

Jointing the head
Thread a washer and a disc onto a cotter pin. Put the cotter pin/washer/disc set into the hole in hedgehogs head. Use a leader stitch to close the head hole.
Push the cotter pin through the chosen joint hole in the body. Add the disc and another washer and with the help of a long nose pliers or a cotter pin turner, turn each cotter pin's leg away from each other and tighten it very well.
 Stuffing
Use small pieces of fiber fill stuffing and stuff the arm from the paw pad first. Stuff firmly and fill it well. Use a stuffing tool to do so. Turn the raw edges of your opening inwards and ladder stitch the hole closed. Each stitch should be pulled tightly and the seam will close. Tie off with a knot and cut the thread. Do not over stuff the area where the ladder stitching will be sewn as this is a stressed area and stitches may not pull correctly together. Don’t forget to add steel pellets in to the feet about one tea spoon. And then stuff the legs in the same manner as the arms (mentioned above). Instead of making toes on arms and legs I just use nose thread and simple stitch to mark the nails.

Stuffing the body
Using small bits of stuffing at a time, stuff the body firmly. Don’t forget to add steel pellets at first. Make sure that the bum and tummy are stuffed well. Turn in the raw edges at the opening on the back and ladder stitch it closed.

Shading
Carefully shade the nail lines and tummy, areas above eyes and around the muzzle with a dark brown oil paint.
Extract small amount of paint on some paper and leave an hour to drain off the oil. Then soak brush in to the paint swept it into piece of some material and line material until you see the brush dye very pale then start to tone bear. But I recommend trying it on the peace of fur at first.

Accessories

The accessories are of your choice J I like to use natural silk ribbon dyed with silk paint in the color I want.

I hope you like this tutorial and Have a very fun time making your own Hedgehog...
You can find more Teddy bear PDF patterns in my SHOP

Best wishes, Simona

DIY tutorial: Decorate a cup using a porcelain marker

 We are happy to share with you Asta's cup decorating DIY tutorial. This is a great idea for St.Valentines day gift ;) She was very kind to share it with us and I recommend to visit her beautiful blog with more ideas.
 I have no doubt that you have your favorite tea cup or big coffee mug. I think every one of us have one :) There are two of my favorite cups in the kitchen: big cup for a tea which I brought from London and a big mug for coffee from Starsbuck in Paris. But of course I have some extra cups for my friends and myself too. When one of them crashed, I started to look for a new one to replace and couldn’t find anything interesting and original cup in the local shops. Then – hooray! Idea came to my mind and I thought why not just create original cup by myself and I started to look how I can do it.

Today I'm willing to share with you how you can do the same. Let’s decorate a coffee mug using a porcelain marker together!
Supplies:

1. One color porcelain cup
2. Porcelain marker (you can find one in local art shop or online)
3. Paper, scissors, soft pencil (HB or 2B) and sticky tape

Step 1

Think about what you want to paint on the cup. E.x. Cats were in my mind at that time when I created my original cup :)

Cut the stripe of paper and make sure it is same high and length as a cup is. Now draw the illustration on it. Yes this is most fun part!
Step 2

Using a soft pencil and applying a lot of pressure, trace the basic lines of your illustration.
Step 3

Now turn around the piece of paper with the illustration and attach it to the cup, with the illustration inwards (yes inwards), using some sticky tape.

Don’t forget that any design transferred with this technique will be mirrored. If you need to transfer any text, you should write (if you can) or print it mirrored in order to be able to read it on your cup!
Step 4

Use the pencil to draw over the lines of the drawing. This will help transfer the image on to the surface of your cup. Apply a lot of pressure and make sure you don't forget to go over every detail of the illustration. I also discovered that it’s possible just to use a hard part of the marker to press the illustration and outline it with pressure.
Step 5

Carefully remove the paper and you’ll see the illustration on your cup. It should be visible enough to use it just as a guide.
Step 6

It’s time to have fun again and ink your design! Love this step! :)

Before you start using the porcelain marker, shake the pen well and push it vertically on a piece of the paper and check that the appropriate amount of paint is released.
Step 7

Carefully trace over the pencil drawing with the porcelain marker to create the basic outlines. Don’t worry if you made a mistake. When the ink is still wet, you can correct mistakes by wiping them with a wet wipe. Make sure cup is dry before you proceed again.

After you finish painting cup needs to dry for 24 hours
Step 8

Now your big mug or cup is ready!

Note: Use the marker as it’s written on the instruction. Some of the markers just need to dry for 24 hours. Other brands of porcelain markers need to be baked for about 30-90 minutes in order to fix the paint. If you’ll bake your cup, be sure to remove any stickers from the bottom, because I guess you don’t want to cook those! After fixing the ink, the mug is ready to be used and most of them are dishwasher safe (again depends on the marker you used).
Hand painted cup, plate or bowl can be a great, original and easy to make gift for your friends or family members. You can already imagine your loved person smiling in the morning while drinking from the cup which is unique and reminds about you, don't you?

I really hope this guide will help you and you will create a piece of artwork! If you do, please share with me! Also you are very welcome to check all the cups I made so far and of course buy one if you want!

Now after hard work it’s time to enjoy coffee!

Natural linen textile - Aprons, towels, napkins, bags by CozyLinen

Here is CozyLinen SHOP and story....

I am Simona and this my Cozy Linen shop.
Here you can find linen goods not only for Your home, but even for Your farm house or vacation.
So how everything begun and is it real LOVE?
I was born in a little tow near the Baltic sea. My mother and granny worked in a fabric of linens and all my childhood I was surrounded of linen fabrics.
Maybe this is the reason I fall in love with this material.
That's how I decided not only use it for myself but to share my hand made products with you.
Specification of linen
Linen is a wonderful natural fabric. It is very durable, washes easily and dry quickly. Linen is perfect to use in your kitchen and home. And for sure it is one of the best decision for commercial use. Restaurants, cafes and flower shops are very satisfied when using linen.
This perfect natural fabric are just adorable when You need to decorate Your wedding table too.
My main goals are happy and satisfied clients.
So I use only the best Lithuanian linen. I can help You to choose product You need and make a custom order when You will need something different.
If You have any questions I will answer all of them so don't hesitate and ask.
Hope we will have good time collaborating.

Best wishes, Simona

Teikia „Blogger“.

Popular Posts

Like us on Facebook

Follow Us on Instagram