Mohair... Always and forever?


Mohair is one of the oldest and most expensive textile fibres, produced exclusively in Turkey for thousands of years and achieving importance in European textile manufacture during the 19th century.
All the time it was a luxury attribute, nowadays it's more accessible in different sizes and shapes as plaids, dresses, accessories, toys etc. 

The mohair slouch hat could be your perfect accessory this autumn - winter time. MalramBoutique sells this cozy hat.


SweetDreamsProps presents wonderful soft mohair bears. For me as an adult they are really appealing, would love one next to my bed. 


This adorable mohair cowl from RDesignStore will protect you from cold as well serve as an exclusive accessory.


Mohair for our little ones, what can be more fun than soft and cozy mohair fibre?.. Wonderful dress for little princess from Ramuneart must stay the most important thing in small girl festivity.


Or this newborn romper from mohair for the little ones... Found in NeringaWorkshop


Do you already want mohair?.. yes, me too :)

Personal wool OOAK dolls by SmallMiraclesDolls

 This time we introducing a wonderful baby dolls author SmallMiraclesDolls.
Here is her story and shop link.

Perfectly handmade - Personal OOAK dolls, Warming microwavable baby toys, New baby gifts
 
Meet the dolls that are born from dreams and create small miracles in people’s hearts. Each doll as unique as the person it’s being made for himself. 100% handmade, stuffed with warmth, love and care, good thoughts and wishes.
 The main idea for WARMING GNOMES is soft handmade dolls stuffed with wool, with a small bag of salt or buckwheat inside. All you have to do is to warm the bag in the oven or microwave and put it back to the dolls belly. The wool takes the warmth of the bag and the toy stays warm longer, giving your child a snuggy hug and thermal healing.
Each toy lives in his own bag, containing short instructions of using. It’s a perfect gift visiting a newborn!
You can choose one of many available colours and combinations, suitable for a girl, a boy or a baby-surprise. :)
 I also love making OOAK (one-of-a-kind) DOLLS, it's my real passion, which brings a lot of joy and also challenge each time I start a new project.
Why are they so special? They have a little heart inside their chest, something intended for that specific doll and the person it’s being made for. It can be something I feel is needed or anything you bring a meaning – amber, sea stone with a hole, shell, ring, cross… It also has a little note with written wishes or traits for that someone special. Each doll has its own energy and also its own special heart with wishes from me and you.
The doll can be anything you want to. As a boy, it also has something only the boys have – otherwise how would you know it’s a boy? 😉 A child can undress the doll completely, the clothes are removable, so you can wash them or sew something yourself. It’s also useful for the children to train undressing the dolls and fastening the buttons.
The hair is easy to brush, band and braid without any fear it gets damaged. The doll is soft, warm and cosy. The arms and legs move and bend. Size approx. 35 cm (13.8 in), weight 200 g (0.44 lb).
The dolls are made mainly FOR CHILDREN. They are completely safe, suitable for hugging, playing, loving, snuggling. 
For more information, visit my site.


Cutest handmade Teddy Bears, rag dolls, baby merino blankets by MadeByUgne

Here is MadeByUgne story and her SHOP.

My first creation was a linen teddy bear after welcoming my daughter. Teddy after teddy it slowly developed to a small business of mine.
Now I have a son as well and more products that I make. I can offer warm and cosy knitted extra fine merino wool baby blankets and matching knitted woolen socks. Also I make not only soft Teddy bears, but rag dolls and bunnies as well. 
Everything I make is first and foremost dedicated to my kids. I make things that are warm, useful and especially designed according to needs of children. Items from my shop will be perfect gifts for all occasions from newborns to toddles, such as baby shower, Christening, Christmas and birthdays.

Safe, soft and friendly Crocheted&Knitted Creations by YarnBallStories

Here is YarnBallStories SHOP and their about story.

“The Yarn Balls Stories” means stories told by the yarn balls

WE ARE Virginija and Dovile, both sisters and mothers and also co-creators of the yarn balls stories. The idea of making soft toys came across when our own kids were born. Therewith, they became our inspirations, creative collaborators and the first ones who test and approve our works.
WHAT MATERIALS ARE USED? – We have strong desire to grow our kids in a friendly and healthy environment, see them play with cute and safe toys, what naturally led us to knitting and crocheting. Most of our works are made from cotton, wool and other organic fibers, stuffed with polyester fillers – to keep the shape after frequent washing and to avoid allergies. 
EDUCATION. WORK. CREATION. – Our lifestyle, interests and education goes along with the works of The Yarn Balls Stories. Virginija has Master in psychology, and at the moment works as a child psychologist at school. Dovile has finished history and philosophy of media studies; moreover she continues the search in the fields of philosophy. These everyday activities and work areas brings us to the same attitudes about safe childhood, games and the development of Creativity.
Urban knitting is one of the most exciting street art styles that inspire us, so we started to create street/outdoor installations – called Urban Knitting or Yarn Bombing. This style of art goes close with our beliefs, it worms up public spaces, and it makes cold and hard places into a feeling of friendly and cozy home, it also brings new and unexpected into everyday life of citizens.
All these things float in our art works and encourage the development and improvement.

Felted slippers and more by MusiuMuse

Curly curly... sheep in MusiuMuse hands becomes in a wonderful felt creatures. Visit her SHOP.

My husband has curly hair. My both daughters has curly hair... But I don't! So I just had to start working with something that would compensate this little misunderstanding :) Beautiful curly sheep... 
 Originally I am archaeologist and also worked as a restorer of archaeological artifacts (ancient wood and pottery) until I become a mom. Felting is ancient technique, so it perfectly fits to me. However, I do it in a modern way. 
I use only high quality materials and do the best I can with help of my own hands, boiled water, olive soap and fantasy.

Felted shawls, slippers, baby booties, jewelry by FeltStudioVART

Here is felted distinctive accessories by Vaida Petreikis. Shop FeltStudioVART and all the story.

My name is Vaida, I live in the middle of Europe, in a small country near the Baltic Sea – in Lithuania. Felt came into my life in 2006, at first just as a hobby, but, step by step, this evolved into something else. It’s my passion. It’s my self-expression. My lifestyle. I just believe in what I do. I felt various shawls, ruffle scarves, arm warmers, finger less gloves, slippers, dresses and much more.
Especially I love to make those super cute booties for the smallest ones, for babies! I make jewelry with handmade felt, various interior items from diverse materials, combining different techniques. Felt, metal, wood, stone, even photography - all in one. I love diversity and experiments. In everything. Even my education is quite a strange mix: Bachelor’s degree in Art and Art’s History, Master’s degree in Applied Sociology, Master’s degree in Information Technologies, seven-year studies at the Music school, studies at Textile Art school. I think that all education, all things I did and do in my life are closely related. It's a lifestyle. And art is an inherent part of my life.

By the way, I live in the very center of Kaunas and I love it! Living here allows me to feel the very essence of the city, to participate in its life, to be in it and… To maintain my privacy at the same time. My felt and photo studio is located in an old 19th century building in the main street of Kaunas, so if you ever came to Lithuania, you are welcome in my place! 

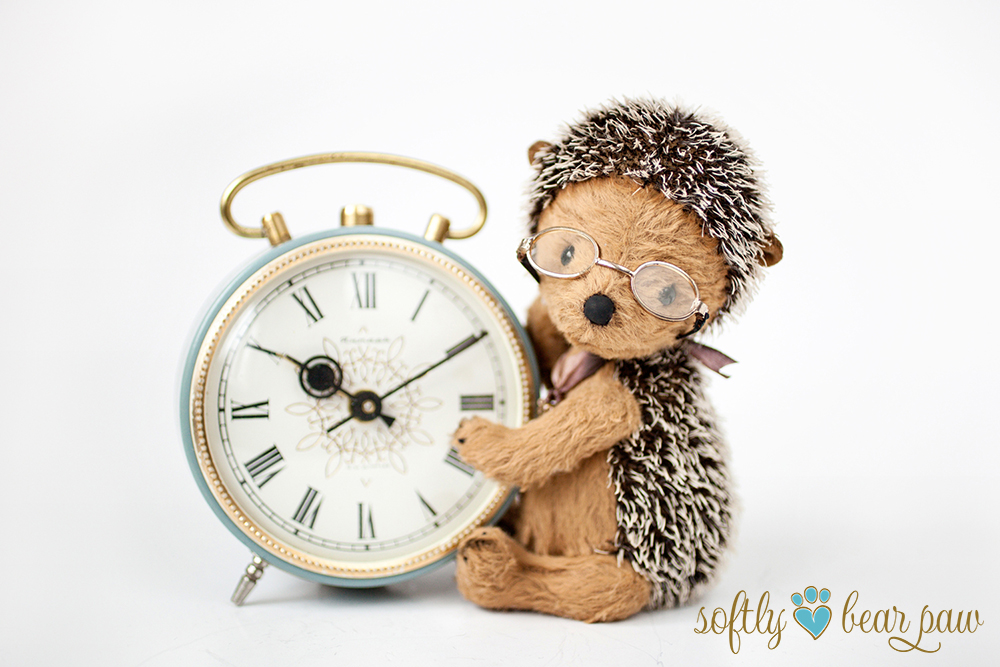
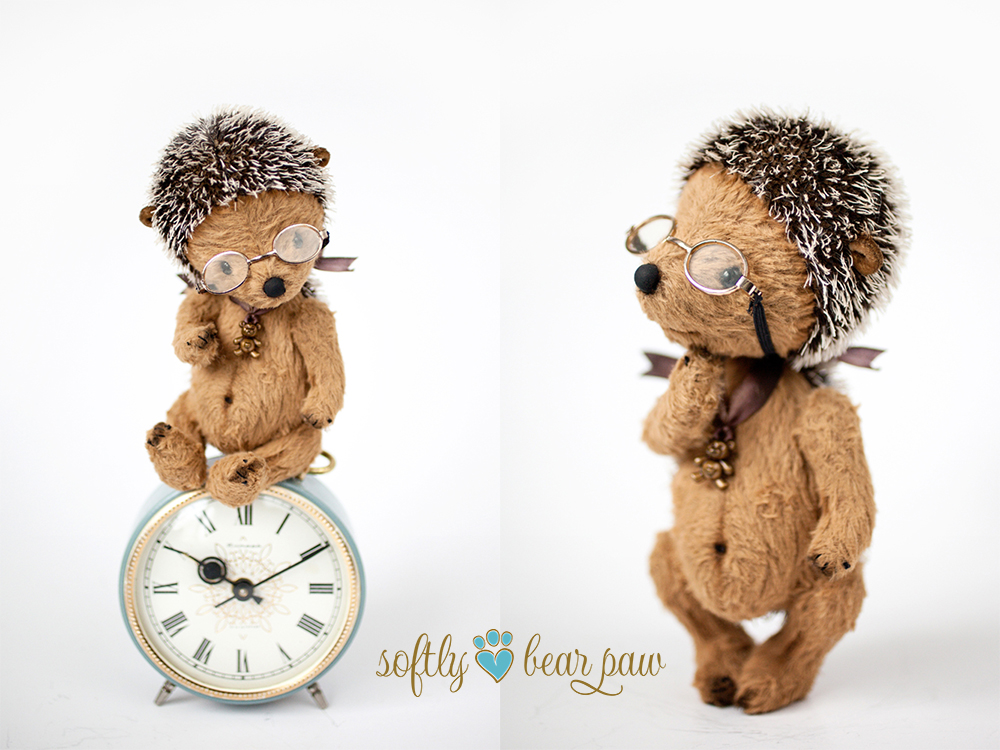
DIY: Artist Teddy bear Hedgehog Free Step by step TUTORIAL by SoftlyBearPaw

This is my Teddy bear Hedgehog free tutorial which I would like to share with you. Teddy Hedgehog is 19cm tall while standing.
Happy sewing my friends ;) 
 
Material list

Hedgehog mohair 9mm pile – 20x20cm
Brown viscose 6mm pile – 25x22cm
Little piece of suedine for ears
6mm black glass eyes
6 x 15mm wooden discs for head and arms
4 x 20mm wooden discs for legs
10 x 12mm washers
5 T-shape cotter pins
Fiber fill for stuffing
Steel pellets for legs and tummy
Strong thread for sewing
Very strong eye yarn
Nose thread


Sewing Supplies
Little sharp scissors, Awl, Pins and needles, Cotter key and long nose pliers, Wooden stuffer, Fray stop, Oil paint and paintbrush for shading.

Bear Pattern
First of all you will need to transfer the pattern on heavy paper, and cut out all the details.  Mark all the signs that are shown on the pattern.
The arrow indicates the direction of the hair. The big dot shows the place where you will need to make a hole for joints. You also see a marked places where you must leave open place. Just make sure than you made a good knots in the end of seams and stain the open place with stir fray glue.
 
Transfer them to the wrong side of the fabric. It is most convenient to make it with a ballpoint pen. On light color fabrics I just use a pencil. Mark out all the pairs of items in mirror image. All my patterns are with 3mm seam allowance so you don’t need to add more. When working with patterns, pay special attention to all the marks! Transfer them all on the fabric.
Once the pieces all fit correctly onto the fabric then cut them out using a sharp scissors. I use embroidery scissors for cutting the pile. When cutting out fur (especially those with longer pile) insert the scissors under the fur when you cut.

Head
Start with the head and muzzle pieces. Place these pieces together with the furs together (inside out) and pin them. (You can never use too many pins!)When pieces are pined then sew them. Use back stitch to sew the pieces together. All seams are 3mm. 

After this you will have two head pieces. Now sew the arrow on each of the peace. After you have two finished peaces place them together with the furs together (inside out) and pin all around and sew. Don’t forget to leave hole for head joint.
Apply fray stop to the open area to prevent fraying during the stuffing.
Turn the hedgehog head to the right side out.  Stuff the head starting at the nose with small pieces of stuffing at a time. Use wooden stuffer.
Eyes
Place pins in the position you would like your eyes to be to test where the eyes should be inserted. Cut a long piece of eye thread. Pick one of the lengths, and thread both ends through the long doll needle, leaving a loop at the end. Insert the needle in the place where the ears should be, coming out through the hole of the opposite socket where the eye pin is inserted.  

mportant Note: leave thread loop hanging out of the ear – DO NOT PULL ALL THE WAY THROUGH.
Thread the needle through the wire loop of the eye and insert the needle back in the same hole. Come out almost next to where you started.
Wrap the needle 3 times through the synthetic sinew loop you’ve left behind and pull hard.
Insert needle next to where you first started and exit anywhere on the head.

Nose and mouth
Select a nose shape. Mark the shape onto the nose area and embroider it on using a satin stitch. Stitch the mouth on in the shape you desire.

Body
Sew the back part of the body piece and the front part of the body piece together to form the two sides of the body.
Place the two body pieces together and sew around, leaving the back open as indicated on the pattern.
Apply fray stop to the opening in the back to prevent fraying during stuffing.
Turn your body the right side out.

Arms and Legs
As my hedgehog pattern arms are without paws. Just put the arms pieces rights sides together and sew around the edges leaving and open space as shown in the pattern. And repeat this with the legs. Apply fray stop to the opening to prevent fraying during stuffing.

Ears
Sew around the ears leaving an open space where indicated on the pattern. Turn the right way around. Sew the ear closed using a ladder stitch. Pin the ears in place. Attach to the head using a ladder stitch.

Jointing the limbs
Thread a washer and a disc onto a cotter pin. Put the cotter pin/washer/disc set into the hole (use an awl to make a hole) in your limb and push the cotter pin through the marked joint hole and then into the corresponding hole in the body. Add the disc and another washer and with the help of a long nose pliers or a cotter pin turner, turn each cotter pin's leg away from each other and tighten it very well. Perform the steps for the other limbs.

Jointing the head
Thread a washer and a disc onto a cotter pin. Put the cotter pin/washer/disc set into the hole in hedgehogs head. Use a leader stitch to close the head hole.
Push the cotter pin through the chosen joint hole in the body. Add the disc and another washer and with the help of a long nose pliers or a cotter pin turner, turn each cotter pin's leg away from each other and tighten it very well.
 Stuffing
Use small pieces of fiber fill stuffing and stuff the arm from the paw pad first. Stuff firmly and fill it well. Use a stuffing tool to do so. Turn the raw edges of your opening inwards and ladder stitch the hole closed. Each stitch should be pulled tightly and the seam will close. Tie off with a knot and cut the thread. Do not over stuff the area where the ladder stitching will be sewn as this is a stressed area and stitches may not pull correctly together. Don’t forget to add steel pellets in to the feet about one tea spoon. And then stuff the legs in the same manner as the arms (mentioned above). Instead of making toes on arms and legs I just use nose thread and simple stitch to mark the nails.

Stuffing the body
Using small bits of stuffing at a time, stuff the body firmly. Don’t forget to add steel pellets at first. Make sure that the bum and tummy are stuffed well. Turn in the raw edges at the opening on the back and ladder stitch it closed.

Shading
Carefully shade the nail lines and tummy, areas above eyes and around the muzzle with a dark brown oil paint.
Extract small amount of paint on some paper and leave an hour to drain off the oil. Then soak brush in to the paint swept it into piece of some material and line material until you see the brush dye very pale then start to tone bear. But I recommend trying it on the peace of fur at first.

Accessories

The accessories are of your choice J I like to use natural silk ribbon dyed with silk paint in the color I want.

I hope you like this tutorial and Have a very fun time making your own Hedgehog...
You can find more Teddy bear PDF patterns in my SHOP

Best wishes, Simona

Something interesting about Amber and how it's made...

This story was shared by Aiste and her blogg Drop of Amber where you can find more interesting information about amber ;).

I hope most of my readers realize that amber is not really "made" as such. It has been around for hundreds of millions of years and is a product of a long process.
Amber is fossilized tree resin (not sap). Hundreds of millions of years ago huge coniferous forests covered big parts of what is today Baltic sea and its environs. Resin from these trees (in our region its Pinus succinifera and similar trees) seeped down sometimes trapping insects or other organic matter (this way forming so called inclusions) and then solidified. Geological changes caused parts of the forest to be buried under the ground or later even water and the process began.
 Molecular polymerization, resulting from high pressures and temperatures produced by overlying sediment, transformed the resin first into copal. Sustained heat and pressure drove off terpenes and resulted in the formation of amber.
There are several conditions which had to be present in order for resin to become amber.

The starting resin had to be resistant to decay. Many trees produce resin, but in the majority of cases this deposit is broken down by physical and biological processes. Exposure to sunlight, rain, and temperature extremes tends to disintegrate resin, and the process is assisted by micro-organisms such as bacteria and fungi. For resin to survive long enough to become amber, it had to be resistant to such forces or be produced under conditions that exclude them.
Other kinds of amber came to be in a similar way, only the resin came from different trees, thus resulting in a different chemical composition.
 This is the reason why only Baltic amber is considered to have medicinal properties due to one of its components -- succinic acid. Teething necklaces and bracelets (only made from untreated Baltic amber) are used for this reason as well. If you are choosing a teething necklace for your child -- be careful, a lot of amber that is nicely transparent (especially bigger sized beads, uniform in shape) is usually heat treated amber -- it is boiled in hot oil to become transparent. But unfortunately during this procedure it loses most of its succinic acid, which is the healing bit of amber.


Eco friendly, organic wooden toys by FriendlyToys

FriendlyToys which smell like a forest story...
We, Sigita, Donatas, Saule and Goda, are a family. Even before the arrival of our baby we’ve already felt the importance of the bond between nature and a child. Therefore we left busy city life of Vilnius and moved to the place where trees touch the sky. Inspired by watching our daughter grow we began creating wooden toys. Later on more and more people were willing to give their children the joy of playing with eco and human friendly toys that we make. Finding pictures of smiling little clients holding our manufactured toys or warm thank you letters in the inbox was (and still is) a constant encouragement to maintain our business. We are glad that now not only Lithuanian children but also those who live across the Atlantic enjoy playing with our wooden creatures. Friendly toys can be found at homes where babies haven’t even arrived yet – wooden toys which smell like a forest appear to be perfect decorations for those who love handcrafted interior elements.

Why are our toys friendly? First of all, the materials which we use are 100% natural and biodegradable: birch, natural „Milk Paint“ paint, linen strings and cold-pressed linen seed oil which has both natural scent and moisture protection quality. Secondly, the toys are born in the family and inspired by its smallest member. Thus in the environment full of love toys are infused with nothing but friendliness and good energy.

Our world is full of hypnotizing snails, spinach loving dogs, sheep waiting for fairytales, horses pasturing in wild strawberry fields, fashionable helicopters, buses full of mushroom pickers and other forest animals and visitors. Find your child a new, safe and lovely friend here!

Handmade baby bedding, gifts, quilts, pillows, toys by CotandCot

We introduce you CotandCot SHOP and their handmade cotton baby bedding. 
I believe that everything made by hand, somehow has it soul. Every time I hold a piece of fabric, I know, that something magical is about to happen. And it is not only about the colors or texture, but mostly the emotion and intention which you put in to every single item. I guess it even couldn’t be otherwise, as we are dedicating our hard work to the most beloved and adored children.
“Cot and cot” is a crafty family business kind team. Newborns, babies, toddlers, kids - they all are in the limelight of our inspiration, future hopes and dreams. It is our job to surround children with the best we can. So the main direction of “Cot and cot” is to provide all kind of textile items for a baby room. These are sets for cribs and cots, baby beds, baby/toddler bedding, quilts, decorative pillows. Everything is made from 100% cotton fabric, created in unique design and made by hand.
However, fabric crafts are way more than that - ideas are expanding every day, so time to time we add some magic and wonderful new items are being made :) I can not wait to share it with you!

Teikia „Blogger“.

Popular Posts

Like us on Facebook

Follow Us on Instagram